最近はポータルから Web Apps を作るのに飽きてきたのと、毎回 App Insights が勝手に作成されるのに嫌気がさしてきたので、ARM テンプレートで必要な設定が行われた Web Apps を作る方法を調べました。
Azure Resource Explorer は普通に使ってますが、実はテンプレートを使ったデプロイのカスタマイズは初めてです。ARM テンプレートの基本的な情報は、Azure 界の抱かれたい男 No.1 こと @kosmosebi のブログを参照してください。
Azure Resource Managerのテンプレート作成方法 | ブチザッキ
Visual Studio と Azure SDK の組み合わせだと、JSON アウトラインや IntelliSense でかなり便利に書けるようです。JSON アウトラインはかなりわかりやすく表示出来てます。

分かり切ったことかもしれませんが、Azure Web Apps は App Service Plan と Web App の 2 つで成り立っているので、最低でも 2 つのリソースが必要となっています。
既に App Service チームの David Ebbo 氏が GitHub ですぐに使える ARM テンプレートを公開してくれているので、これを参考に目的のテンプレートを作っていけば簡単です。
AzureWebsitesSamples/ARMTemplates at master · davidebbo/AzureWebsitesSamples · GitHub
しかし、これをコピペするだけでは ARM テンプレートの本質的な部分を理解できないので、真面目に ARM テンプレートについて勉強しました。正直、難しすぎると思います。
テンプレートの構造と構文 - Azure Resource Manager | Microsoft Learn
基本的な構造としてはパラメータと変数、そしてリソースを定義した JSON がテンプレート、そしてテンプレートにパラメータとして与える値を定義しているのがパラメータファイルです。
テンプレートは入れ子になった JSON ですが、組み込まれたいくつかの関数が使えるようになっています。例を挙げると、パラメータとして与えられた値は parameters という関数で参照します。
テンプレート関数 - Azure Resource Manager | Microsoft Learn
利用可能な全ての関数について、公式のリファレンスが用意されています。概要はこのくらいにして、実際にテンプレートを作って試しながら進めていきたいと思います。
基本的なテンプレート
ひとまずは 1 つの App Service Plan と Web Apps をデプロイするために最低限必要な ARM テンプレートを挙げます。この内容で azuredeploy.json というファイルを作成しておきます。
{
  "$schema": "http://schema.management.azure.com/schemas/2015-01-01/deploymentTemplate.json#",
  "contentVersion": "1.0.0.0",
  "parameters": {
    "siteName": {
      "type": "string"
    },
    "appServicePlanName": {
      "type": "string"
    },
    "siteLocation": {
      "type": "string"
    },
    "sku": {
      "type": "string"
    }
  },
  "resources": [
    {
      "apiVersion": "2015-08-01",
      "name": "[parameters('appServicePlanName')]",
      "type": "Microsoft.Web/serverfarms",
      "location": "[parameters('siteLocation')]",
      "sku": { "name": "[parameters('sku')]" }
    },
    {
      "apiVersion": "2015-08-01",
      "name": "[parameters('siteName')]",
      "type": "Microsoft.Web/sites",
      "location": "[parameters('siteLocation')]",
      "dependsOn": [
        "[resourceId('Microsoft.Web/serverfarms', parameters('appServicePlanName'))]"
      ],
      "properties": {
        "serverFarmId": "[parameters('appServicePlanName')]"
      }
    }
  ]
}
このテンプレートはパラメータとしてサイト名、App Service Plan 名、リージョン、SKU を取ります。そしてリソースは Microsoft.Web/serverfarms と Microsoft.Web/sites が定義されています。
パラメータも同様に JSON で定義しますが、スキーマが異なっているので注意が必要です。この内容で azuredeploy.parameter.json というファイルを作成しておきます。
{
  "$schema": "http://schema.management.azure.com/schemas/2015-01-01/deploymentParameters.json#",
  "contentVersion": "1.0.0.0",
  "parameters": {
    "siteName": { "value": "mysql-wordpress" },
    "appServicePlanName": { "value": "Default0" },
    "siteLocation": { "value": "Japan West" },
    "sku": { "value": "B1" }
  }
}
Azure Resource Manager はこのテンプレートとパラメータファイルを組み合わせて、実際にリソースのデプロイを行います。細かく要素に分解すると、もう少し分かりやすくなるかも知れないので、Web Apps で使える子リソースを紹介します。
リソースを使って設定を行う
Microsoft.Web/sites の子リソースとしては、いろんなものを指定可能です。Web Apps 自体の設定や接続文字列、そして Site Extension のインストールまで行うことが出来ます。
よく使いそうなリソースを一部ですが簡単にまとめておきました。詳しくは ARM Explorer が便利です。
Web Apps の設定
{
  "apiVersion": "2015-08-01",
  "name": "web",
  "type": "config",
  "dependsOn": [
    "[resourceId('Microsoft.Web/Sites', parameters('siteName'))]"
  ],
  "properties": {
    "netFrameworkVersion": "v4.0",
    "use32BitWorkerProcess": false,
    "webSocketsEnabled": true,
    "alwaysOn": true
  }
}
アプリケーション設定
{
  "apiVersion": "2015-08-01",
  "name": "appsettings",
  "type": "config",
  "dependsOn": [
    "[resourceId('Microsoft.Web/Sites', parameters('siteName'))]"
  ],
  "properties": {
    "AppKey1": "Value1"
  }
}
接続文字列
{
  "apiVersion": "2015-08-01",
  "name": "connectionstrings",
  "type": "config",
  "dependsOn": [
    "[resourceId('Microsoft.Web/Sites', parameters('siteName'))]"
  ],
  "properties": {
    "ConnectionString": { "value": "Data Source=...", "type": "SQLAzure" }
  }
}
スロットスティッキーな設定
{
  "apiVersion": "2015-08-01",
  "name": "slotconfignames",
  "type": "config",
  "dependsOn": [
    "[resourceId('Microsoft.Web/Sites', parameters('siteName'))]"
  ],
  "properties": {
    "connectionStringNames": [ "ConnectionString" ],
    "appSettingNames": [ "AppKey1" ]
  }
}
Site Extension
{
  "apiVersion": "2015-08-01",
  "name": "SiteExtensionName",
  "type": "siteextensions",
  "dependsOn": [
    "[resourceId('Microsoft.Web/Sites', parameters('siteName'))]"
  ],
  "properties": { }
},
MSDeploy
{
  "apiVersion": "2015-08-01",
  "name": "MSDeploy",
  "type": "extensions",
  "dependsOn": [
    "[concat('Microsoft.Web/Sites/', parameters('siteName'))]"
  ],
  "properties": {
    "packageUri": "https://.../msdeploy-package.zip",
    "dbType": "None",
    "connectionString": "",
    "setParameters": { "Param1": "Value1" }
  }
}
Azure PowerShell を使ってデプロイする
作成した ARM テンプレートとパラメータファイルは Azure PowerShell のコマンドレットを使って、記法が正しいかどうかのテストと実際のデプロイが行えます。
Test-AzureRmResourceGroupDeployment -ResourceGroupName "localmysql" -TemplateFile "azuredeploy.json" -TemplateParameterFile "azuredeploy.parameter.json"

New-AzureRmResourceGroupDeployment -ResourceGroupName "localmysql" -TemplateFile "azuredeploy.json" -TemplateParameterFile "azuredeploy.parameter.json"
オプションとして -Verbose を指定すると、詳細なログが表示されます。
Azure Portal からデプロイする
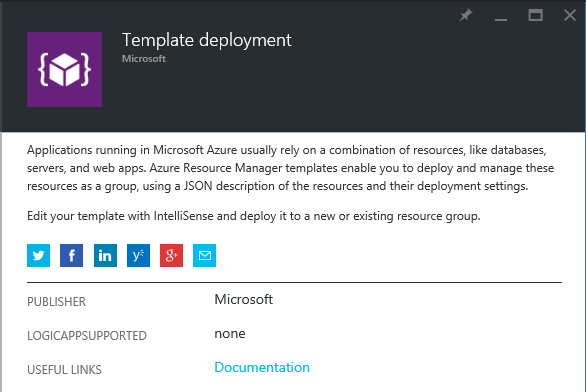
PowerShell を使わずとも、Azure Portal から Template deployment を選ぶと ARM テンプレートとパラメータを設定してデプロイを行うことが可能です。
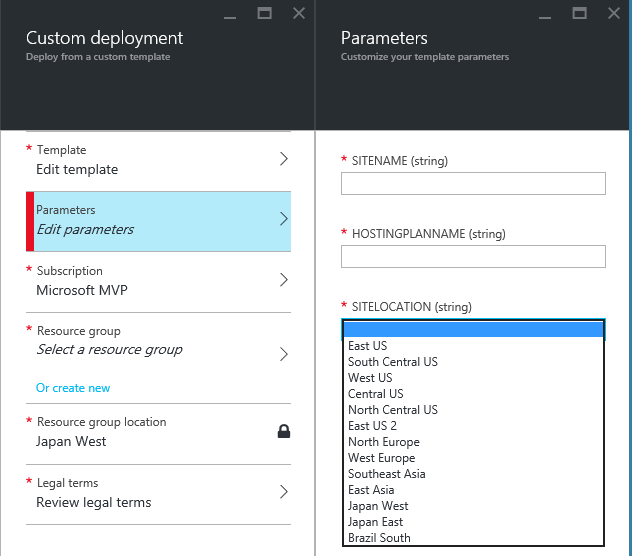
Azure Portal から行うと、パラメータは入力チェックやドロップダウンで選択可能な値の一覧表示などが出来るようになっています。リージョンや SKU を設定時に便利です。
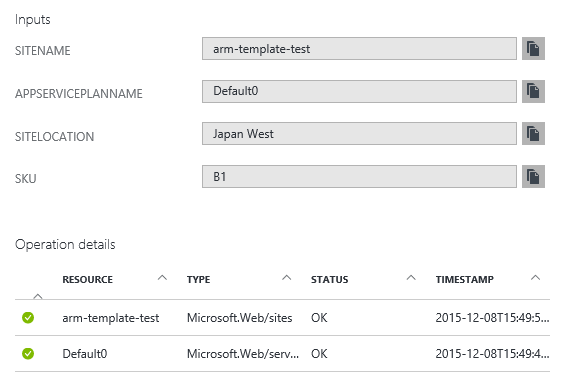
デプロイが成功すると、ARM テンプレートとパラメータで指定した通りのリソースが作成されることが確認できます。デプロイのログにはパラメータ情報も残っています。
とりあえず、これで ARM テンプレートを使った Web Apps のデプロイが出来ました。次回はもうちょっと複雑な ARM テンプレートを作って Web Apps のデプロイ自動化を試してみたいと思います。